


Victorian Varnish
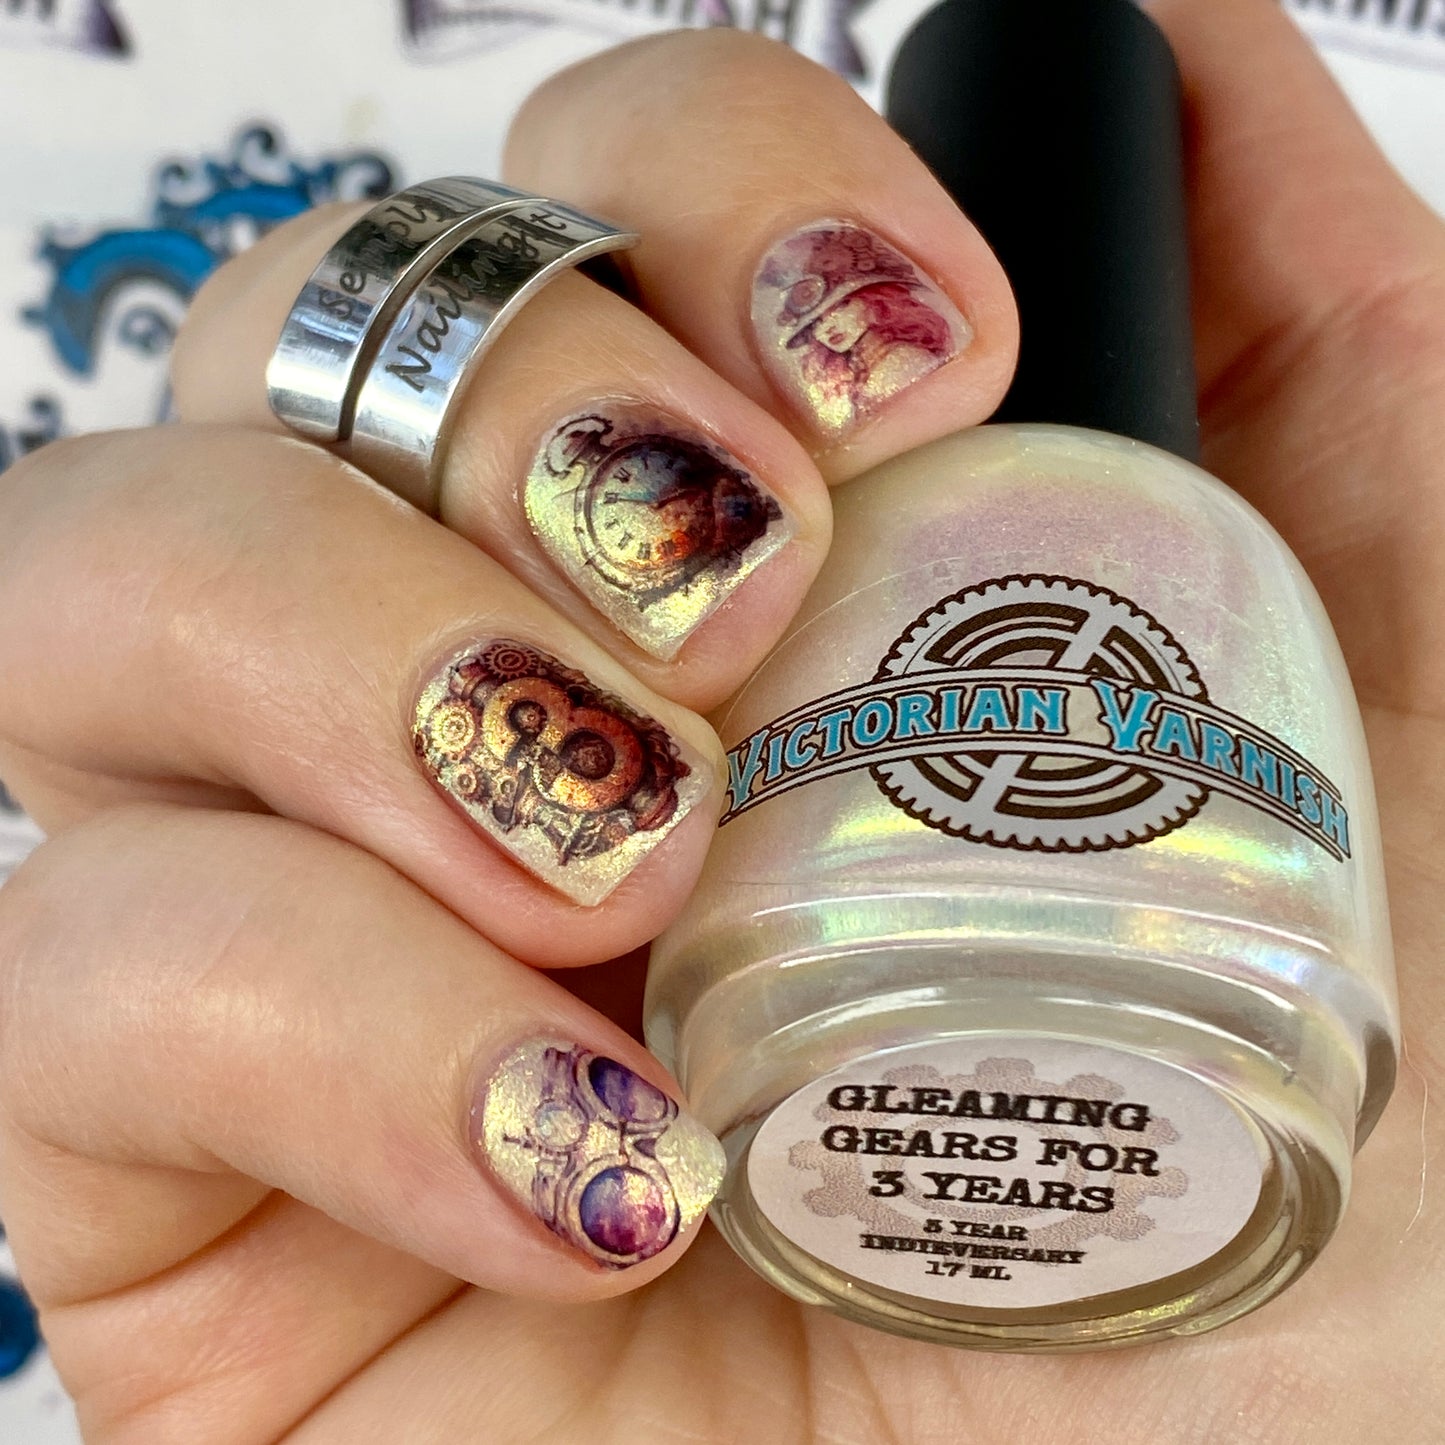
NAIL DECALS ONLY - COLLAB WITH ENCHANTED GOTH NAIL DECALS 3 YEAR INDIEVERSARY
NAIL DECALS ONLY - COLLAB WITH ENCHANTED GOTH NAIL DECALS 3 YEAR INDIEVERSARY
SPECIAL COLLABORATION FOR OUR 3RD INDIVERSARY!
ENCHANTED GOTH DECALS (enchantedgothdecals.com) has teamed up with us to bring us some special nail decals! There are 2 sheets (not sold individually) included.
Waterslide Decal Application Note: Waterslide decal paper is not as durable as nail wraps, it’s easy to rip, so a gentle touch is required.
Application:
1. Prep/shape your nails as usual.
2. Paint/Dip your nails. The nail you’re applying the decal on can be painted any color, as Clipart or Clipart minis are printed on clear decal paper. If you choose anything other than white, you will need to reverse stamp (instructions below). If you want to skip reverse stamping, choose a white base. Once your nails are completely dry/cured etc., proceed to next step.
3. Before applying to your nail, you need a sticky layer on your nail for the decal to stick to. Use a sticky base coat, or a cured layer of gel base coat, or nail foil glue, etc. and let it get tacky. If using a colored base, you may want to wait and do this step while your reverse stamping polish is drying.
4. Cut the decal out from the decal paper, cut it to shape, and soak it in room temperature water until it starts to curl (about 10-30 seconds). Remove from water with tweezers, pat dry, and gently slide it from the backing. (If you’re planning to reverse stamp, pick it up on your stamper head before removing the backing)
5. If your base is colored: Pick the decal up on a nail stamper and then reverse stamp aka color in white polish on the back of it where you want it to be opaque once placed. You may want to skip text as it’s tiny. Keep in mind dark text on a dark background could be lost, or if on same color as the color of text etc. (You’ll want to move slightly faster than normal and use a thin layer of polish, so the decal doesn’t dry out too much before applying)
6. If your base is White: No reverse stamping needed. After sliding the backing off, apply directly to the tacky layer on your nail.
7. Place decal on the prepped nail with your stamper (or you can use your fingers if you didn’t do any reverse stamping). As it’s not full nail coverage, no stretching should be involved. You’re meant to see polish around it in places. Smooth out any creases/air bubbles with a light touch to avoid ripping the decal.
8. There shouldn’t be much excess with clipart, but if there is any extending off your nail trim off the excess or use a cleanup brush dipped in acetone to melt the decal edges and avoid lifting. Be careful not to get acetone on the main part of the decal itself.
9. Encapsulate/seal the decal with 2 coats of top coat, or 1 coat of Base coat and 1 coat of top coat, or in clear dip powder if you’re dipping, etc. Make sure to cure fully in between layers if using gel.
Swatcher IG
myguynails
kzoobeergirl
semplynailingit
fauxynails
Live Swatches/You Tube Channels- lacquer2lashes, heeymercedes, simply_kewi, caffienatedcuticles, tinybubblez83
Live Unboxing - myguynails, semplynailingit, lacquer2lashes
5 free means there is no camphor, toluene, formaldehyde, dibutyl phthalate (DBP) or formaldehyde resin
Ingredients Butyl Acetate, Ethyl Acetate, Nitrocellulose, Adipic Acid/Neopentyl, Glycol/Trimellitic, Anhydride Copolymer, Isopropyl Alcohol, Acetyl Tributyl Citrate, Acrylates Copolymer, Silica, N-Butyl Alcohol, Benzophenone -1;3, Trimethylpentanediyl Dibenzoate
May Contain: titanium dioxide, hydrolyzed protein, magnesium fluoride, mica, synthetic fluorphlogopite, iron oxides, bismuth oxychloride, ferric ammonium, ultramarines, violet 2, red 6-7-30-34, black 2, yellow 5-10, orange 5, cosmetic iron blue, pigments as colorants, non phthalate plasticizer
Couldn't load pickup availability